When I was done framing up the garage I looked at the mountain of construction scraps I had leftover and wondered what I would use them for. Most lengths were between 20cm-40cm (8in-16in), not really long enough to use for a project so most were destined for the fire. But of course, the urge to save money took over and I decided this morning to put some of them to use.
I have a bunch of fold-up chairs in the garage that we use for parties, poker nights, that sort of event. Nine times out of ten they also get loaded in the car and loaned out to family and friends functions as well. The problem’s that on the ground they take up a fair bit of room, when stacked together they are heavy and awkward to move.
After a bit of a think this morning I came up with this hanging rack for them.
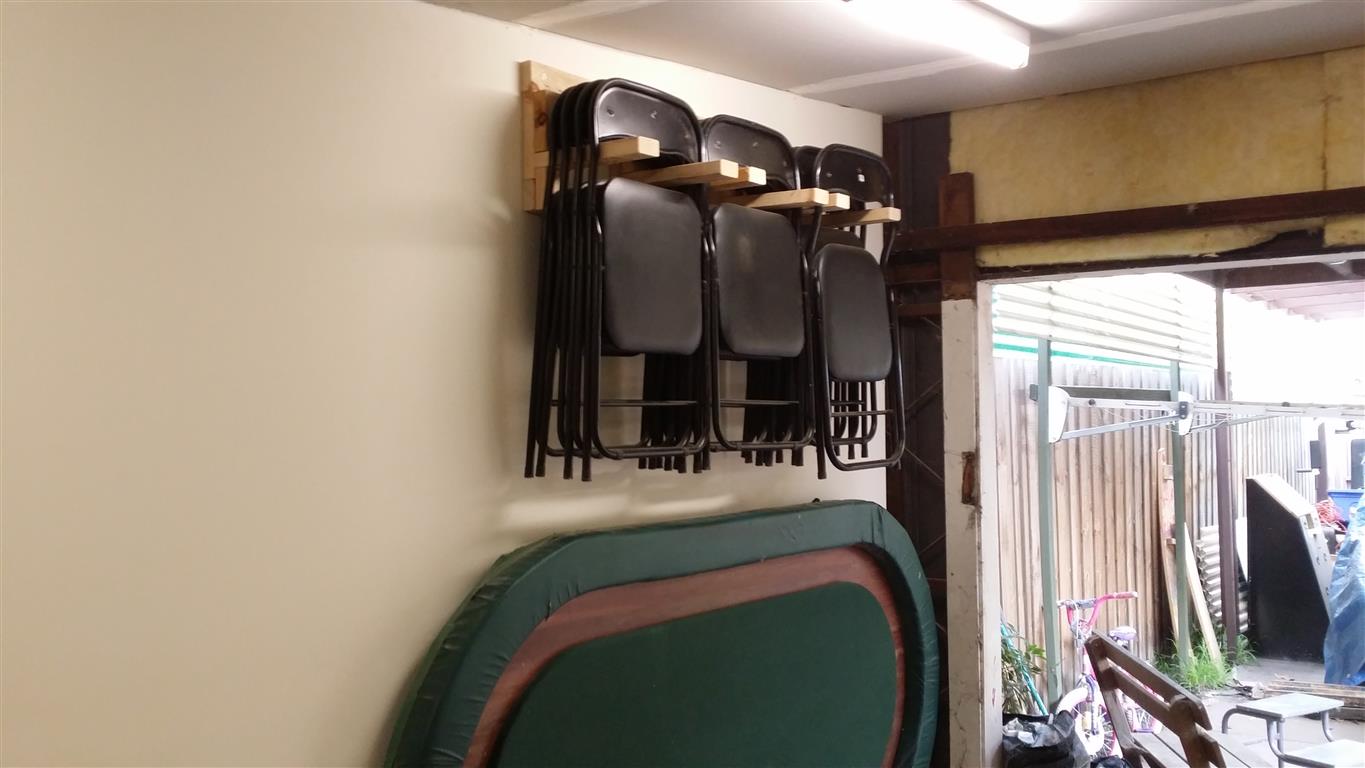
Finding enough timber long enough to use was the hardest part but I got there with some creative layout in the end. I only had a couple of hours to myself so it was joined together with the Kreg jig. Ideally I would have used half lap joints to save money and increase the strength, but I wanted the job done fast. These chairs have been sitting outside along with the contents of my garage for the best part of 4 months, it’s time I got to work cleaning up out here.
It may not be the prettiest rack you’ve ever seen, but the price was right. When loaded up with a dozen chairs it’s hard to see the frame anyway. It is very strong and was simple to construct. The chairs are now completely out of the way but at the same time they are easy to access and will never be blocked off. I’ll paint the rack when I get around to painting a few other projects in the shop and I think it will last me for a very long time.

Ah, shop projects are great. There is no pressure to make them beautiful over functional!